Immagine 943316 Saint Chisto En Jarez Criterium du Dauphine Libere Picture shooted 12/08/2020 - Published 13/08/2020
Immagine 943314 Saint Chisto En Jarez Criterium du Dauphine Libere Picture shooted 12/08/2020 - Published 13/08/2020
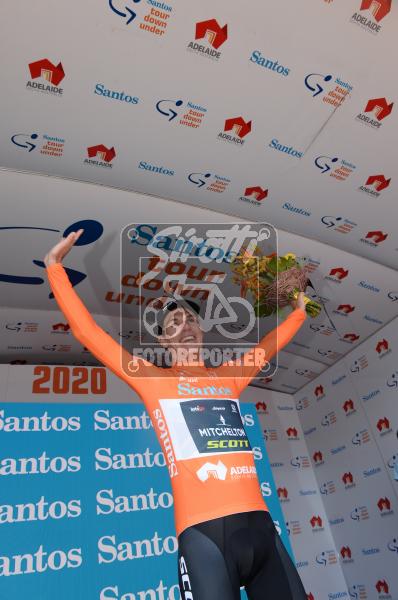
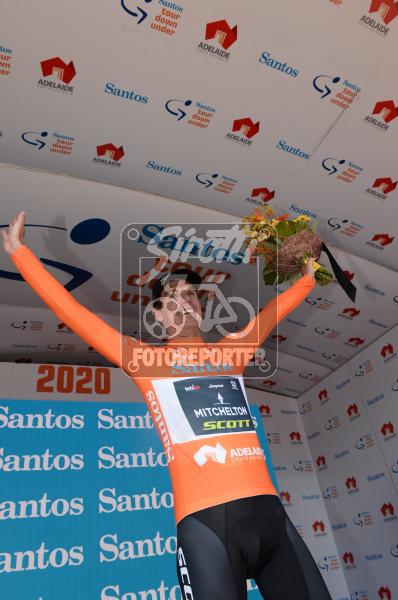
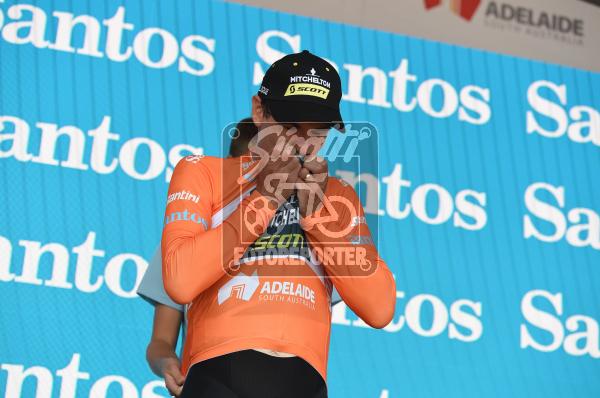
Immagine 892072 Willunga Tour Down Under Picture shooted 26/01/2020 - Published 26/01/2020
Immagine 892071 Willunga Tour Down Under Picture shooted 26/01/2020 - Published 26/01/2020
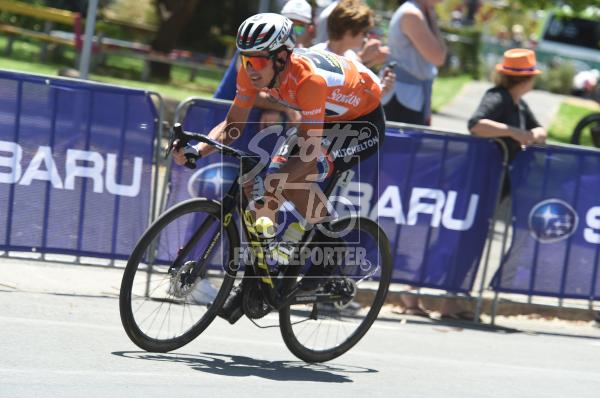
Immagine 891997 Willunga Hill Tour Down Under Picture shooted 26/01/2020 - Published 26/01/2020
Immagine 891947 Willunga Hill Tour Down Under Picture shooted 26/01/2020 - Published 26/01/2020
Immagine 891946 Willunga Hill Tour Down Under Picture shooted 26/01/2020 - Published 26/01/2020
Immagine 891945 Willunga Hill Tour Down Under Picture shooted 26/01/2020 - Published 26/01/2020
Immagine 891944 Willunga Hill Tour Down Under Picture shooted 26/01/2020 - Published 26/01/2020
Immagine 891943 Willunga Hill Tour Down Under Picture shooted 26/01/2020 - Published 26/01/2020
Immagine 891941 Willunga Hill Tour Down Under Picture shooted 26/01/2020 - Published 26/01/2020
Immagine 891928 McLaren Vale Tour Down Under Picture shooted 26/01/2020 - Published 26/01/2020
Immagine 891927 McLaren Vale Tour Down Under Picture shooted 26/01/2020 - Published 26/01/2020
Immagine 891926 McLaren Vale Tour Down Under Picture shooted 26/01/2020 - Published 26/01/2020
Immagine 891923 McLaren Vale Tour Down Under Picture shooted 26/01/2020 - Published 26/01/2020
Immagine 891922 McLaren Vale Tour Down Under Picture shooted 26/01/2020 - Published 26/01/2020
Immagine 891917 McLaren Vale Tour Down Under Picture shooted 26/01/2020 - Published 26/01/2020
Immagine 891883 Willunga Hill Tour Down Under Picture shooted 26/01/2020 - Published 26/01/2020
Immagine 891862 Aldinga Beach Tour Down Under Picture shooted 26/01/2020 - Published 26/01/2020
Immagine 891861 Aldinga Beach Tour Down Under Picture shooted 26/01/2020 - Published 26/01/2020
Immagine 891842 McLaren Vale Tour Down Under Picture shooted 26/01/2020 - Published 26/01/2020
Immagine 891841 McLaren Vale Tour Down Under Picture shooted 26/01/2020 - Published 26/01/2020
Immagine 891840 McLaren Vale Tour Down Under Picture shooted 26/01/2020 - Published 26/01/2020
Immagine 891839 McLaren Vale Tour Down Under Picture shooted 26/01/2020 - Published 26/01/2020
Immagine 891838 McLaren Vale Tour Down Under Picture shooted 26/01/2020 - Published 26/01/2020
Immagine 891837 McLaren Vale Tour Down Under Picture shooted 26/01/2020 - Published 26/01/2020
Immagine 891836 Tour Down Under Picture shooted 26/01/2020 - Published 26/01/2020
Immagine 891835 Tour Down Under Picture shooted 26/01/2020 - Published 26/01/2020
Immagine 891834 Tour Down Under Picture shooted 26/01/2020 - Published 26/01/2020
Immagine 891833 Tour Down Under Picture shooted 26/01/2020 - Published 26/01/2020
Immagine 891832 Tour Down Under Picture shooted 26/01/2020 - Published 26/01/2020
Immagine 891831 Tour Down Under Picture shooted 26/01/2020 - Published 26/01/2020
Immagine 891830 Tour Down Under Picture shooted 26/01/2020 - Published 26/01/2020
Immagine 891829 Tour Down Under Picture shooted 26/01/2020 - Published 26/01/2020
Immagine 891828 Tour Down Under Picture shooted 26/01/2020 - Published 26/01/2020
Immagine 891827 Tour Down Under Picture shooted 26/01/2020 - Published 26/01/2020
Immagine 891826 Tour Down Under Picture shooted 26/01/2020 - Published 26/01/2020
Immagine 891825 Tour Down Under Picture shooted 26/01/2020 - Published 26/01/2020
Immagine 891824 Tour Down Under Picture shooted 26/01/2020 - Published 26/01/2020
Immagine 891823 Tour Down Under Picture shooted 26/01/2020 - Published 26/01/2020
Immagine 891822 Tour Down Under Picture shooted 26/01/2020 - Published 26/01/2020
Immagine 891821 Tour Down Under Picture shooted 26/01/2020 - Published 26/01/2020
Immagine 891601 Tour Down Under Picture shooted 25/01/2020 - Published 25/01/2020
Immagine 891600 Tour Down Under Picture shooted 25/01/2020 - Published 25/01/2020
Immagine 891599 Tour Down Under Picture shooted 25/01/2020 - Published 25/01/2020
Immagine 891586 Tour Down Under Picture shooted 25/01/2020 - Published 25/01/2020
Immagine 891585 Tour Down Under Picture shooted 25/01/2020 - Published 25/01/2020
Immagine 891570 Tour Down Under Picture shooted 25/01/2020 - Published 25/01/2020
Immagine 891569 Tour Down Under Picture shooted 25/01/2020 - Published 25/01/2020
Immagine 891523 Glenelg Tour Down Under Picture shooted 25/01/2020 - Published 25/01/2020
Immagine 891522 Glenelg Tour Down Under Picture shooted 25/01/2020 - Published 25/01/2020
Immagine 891398 Victor Harbor Tour Down Under Picture shooted 25/01/2020 - Published 25/01/2020
Immagine 891397 Victor Harbor Tour Down Under Picture shooted 25/01/2020 - Published 25/01/2020
Immagine 891396 Victor Harbor Tour Down Under Picture shooted 25/01/2020 - Published 25/01/2020
Immagine 891395 Victor Harbor Tour Down Under Picture shooted 25/01/2020 - Published 25/01/2020
Immagine 891394 Victor Harbor Tour Down Under Picture shooted 25/01/2020 - Published 25/01/2020
Immagine 891393 Victor Harbor Tour Down Under Picture shooted 25/01/2020 - Published 25/01/2020
Immagine 891392 Victor Harbor Tour Down Under Picture shooted 25/01/2020 - Published 25/01/2020
Immagine 891380 Victor Harbor Tour Down Under Picture shooted 25/01/2020 - Published 25/01/2020
Immagine 891379 Victor Harbor Tour Down Under Picture shooted 25/01/2020 - Published 25/01/2020
Immagine 891378 Victor Harbor Tour Down Under Picture shooted 25/01/2020 - Published 25/01/2020
Immagine 891377 Victor Harbor Tour Down Under Picture shooted 25/01/2020 - Published 25/01/2020
Immagine 891376 Victor Harbor Tour Down Under Picture shooted 25/01/2020 - Published 25/01/2020
Immagine 891375 Victor Harbor Tour Down Under Picture shooted 25/01/2020 - Published 25/01/2020
Immagine 891374 Victor Harbor Tour Down Under Picture shooted 25/01/2020 - Published 25/01/2020
Immagine 891373 Victor Harbor Tour Down Under Picture shooted 25/01/2020 - Published 25/01/2020
Immagine 891372 Victor Harbor Tour Down Under Picture shooted 25/01/2020 - Published 25/01/2020
Immagine 891371 Victor Harbor Tour Down Under Picture shooted 25/01/2020 - Published 25/01/2020
Immagine 891370 Victor Harbor Tour Down Under Picture shooted 25/01/2020 - Published 25/01/2020
Immagine 890401 Unley Tour Down Under Picture shooted 23/01/2020 - Published 23/01/2020
Immagine 890328 Paracombe Tour Down Under Picture shooted 23/01/2020 - Published 23/01/2020
Immagine 890327 Paracombe Tour Down Under Picture shooted 23/01/2020 - Published 23/01/2020
Immagine 890326 Paracombe Tour Down Under Picture shooted 23/01/2020 - Published 23/01/2020
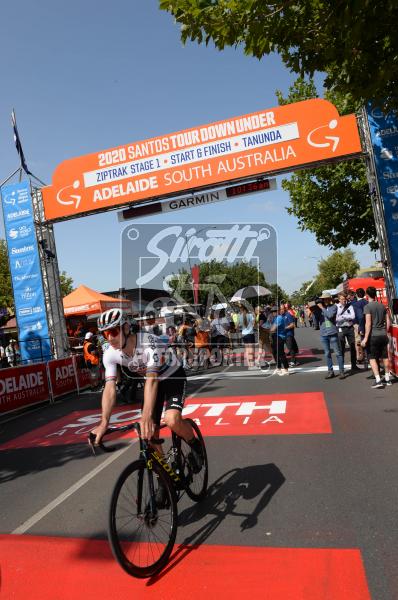
Immagine 889460 Tanunda Tour Down Under Picture shooted 21/01/2020 - Published 21/01/2020
Immagine 889448 Tanunda Tour Down Under Picture shooted 21/01/2020 - Published 21/01/2020
Immagine 889157 Adelaide Hotel Hilton Picture shooted 20/01/2020 - Published 20/01/2020
Immagine 889156 Adelaide Hotel Hilton Picture shooted 20/01/2020 - Published 20/01/2020
Immagine 889155 Adelaide Hotel Hilton Picture shooted 20/01/2020 - Published 20/01/2020
Immagine 889154 Adelaide Hotel Hilton Picture shooted 20/01/2020 - Published 20/01/2020
Immagine 889153 Adelaide Hotel Hilton Picture shooted 20/01/2020 - Published 20/01/2020
Immagine 889150 Adelaide Hotel Hilton Picture shooted 20/01/2020 - Published 20/01/2020
Immagine 889149 Adelaide Hotel Hilton Picture shooted 20/01/2020 - Published 20/01/2020
Immagine 889146 Adelaide Hotel Hilton Picture shooted 20/01/2020 - Published 20/01/2020
Immagine 889139 Adelaide Hotel Hilton Picture shooted 20/01/2020 - Published 20/01/2020
Immagine 889138 Adelaide Hotel Hilton Picture shooted 20/01/2020 - Published 20/01/2020
Immagine 889127 Adelaide Hotel Hilton Picture shooted 20/01/2020 - Published 20/01/2020
Immagine 889109 Adelaide Hotel Hilton Picture shooted 20/01/2020 - Published 20/01/2020
Immagine 889101 Adelaide Hotel Hilton Picture shooted 20/01/2020 - Published 20/01/2020
Immagine 889097 Adelaide Hotel Hilton Picture shooted 20/01/2020 - Published 20/01/2020
Immagine 889088 Adelaide Schwalbe Classic Picture shooted 19/01/2020 - Published 20/01/2020
Immagine 889079 Adelaide Schwalbe Classic Picture shooted 19/01/2020 - Published 20/01/2020
Immagine 889061 Adelaide Schwalbe Classic Picture shooted 19/01/2020 - Published 20/01/2020
Immagine 889039 Adelaide Schwalbe Classic Picture shooted 19/01/2020 - Published 20/01/2020
Immagine 889028 Adelaide Schwalbe Classic Picture shooted 19/01/2020 - Published 20/01/2020
Immagine 888936 Adelaide Schwalbe Classic Picture shooted 19/01/2020 - Published 19/01/2020
Immagine 888927 Adelaide Schwalbe Classic Picture shooted 19/01/2020 - Published 19/01/2020
Immagine 888882 Adelaide Schwalbe Classic Picture shooted 19/01/2020 - Published 19/01/2020
Immagine 888873 Adelaide Schwalbe Classic Picture shooted 19/01/2020 - Published 19/01/2020
Immagine 888711 Adelaide Picture shooted 18/01/2020 - Published 19/01/2020
Immagine 888420 Adelaide Picture shooted 18/01/2020 - Published 18/01/2020