Immagine 1141045 Bologna - San Luca Giro dell'Emilia Picture shooted 30/09/2023 - Published 30/09/2023
Immagine 1133170 Arinsal Vuelta a Espana Picture shooted 28/08/2023 - Published 28/08/2023
Immagine 1131707 Stirling - Scotland World Championships elite cronometro Picture shooted 11/08/2023 - Published 11/08/2023
Immagine 1131706 Stirling - Scotland World Championships elite cronometro Picture shooted 11/08/2023 - Published 11/08/2023
Immagine 1131705 Stirling - Scotland World Championships elite cronometro Picture shooted 11/08/2023 - Published 11/08/2023
Immagine 1119762 Villars Sur Ollon Tour de Suisse Picture shooted 13/06/2023 - Published 13/06/2023
Immagine 1119761 Villars Sur Ollon Tour de Suisse Picture shooted 13/06/2023 - Published 13/06/2023
Immagine 1119760 Villars Sur Ollon Tour de Suisse Picture shooted 13/06/2023 - Published 13/06/2023
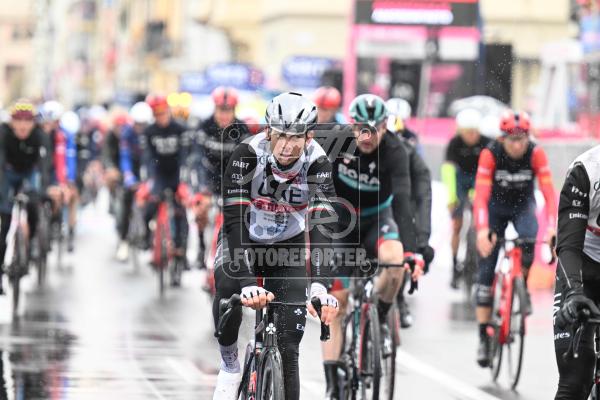
Immagine 1116565 Monte Lussari Giro d'Italia Picture shooted 27/05/2023 - Published 27/05/2023
Immagine 1116390 Monte Lussari Giro d'Italia Picture shooted 27/05/2023 - Published 27/05/2023
Immagine 1116389 Monte Lussari Giro d'Italia Picture shooted 27/05/2023 - Published 27/05/2023
Immagine 1116153 Tre Cime di Lavaredo Giro d'Italia Picture shooted 26/05/2023 - Published 26/05/2023
Immagine 1116129 Tre Cime di Lavaredo Giro d'Italia Picture shooted 26/05/2023 - Published 26/05/2023
Immagine 1116128 Tre Cime di Lavaredo Giro d'Italia Picture shooted 26/05/2023 - Published 26/05/2023
Immagine 1116064 Tre Cime di Lavaredo Giro d'Italia Picture shooted 26/05/2023 - Published 26/05/2023
Immagine 1115612 Zoldo Alto Giro d'Italia Picture shooted 25/05/2023 - Published 25/05/2023
Immagine 1115610 Zoldo Alto Giro d'Italia Picture shooted 25/05/2023 - Published 25/05/2023
Immagine 1115184 Monte Bondone Giro d'Italia Picture shooted 23/05/2023 - Published 23/05/2023
Immagine 1115183 Monte Bondone Giro d'Italia Picture shooted 23/05/2023 - Published 23/05/2023
Immagine 1115182 Monte Bondone Giro d'Italia Picture shooted 23/05/2023 - Published 23/05/2023
Immagine 1113530 Viareggio Giro d'Italia Picture shooted 16/05/2023 - Published 16/05/2023
Immagine 1113529 Viareggio Giro d'Italia Picture shooted 16/05/2023 - Published 16/05/2023
Immagine 1112986 Cesena Giro d'Italia Picture shooted 14/05/2023 - Published 14/05/2023
Immagine 1112985 Cesena Giro d'Italia Picture shooted 14/05/2023 - Published 14/05/2023
Immagine 1112984 Cesena Giro d'Italia Picture shooted 14/05/2023 - Published 14/05/2023
Immagine 1112761 Fossombrone Giro d'Italia Picture shooted 13/05/2023 - Published 13/05/2023
Immagine 1112634 Fossombrone Giro d'Italia Picture shooted 13/05/2023 - Published 13/05/2023
Immagine 1112633 Fossombrone Giro d'Italia Picture shooted 13/05/2023 - Published 13/05/2023
Immagine 1112537 Fossombrone Giro d'Italia Picture shooted 13/05/2023 - Published 13/05/2023
Immagine 1112478 Terni Giro d'Italia Picture shooted 13/05/2023 - Published 13/05/2023
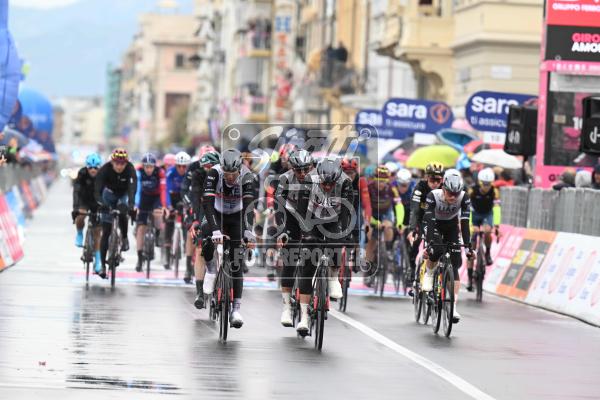
Immagine 1111736 Atripalda Giro d'Italia Picture shooted 10/05/2023 - Published 10/05/2023
Immagine 1111586 Lago Laceno Giro d'Italia Picture shooted 09/05/2023 - Published 09/05/2023
Immagine 1111496 Venosa Giro d'Italia Picture shooted 09/05/2023 - Published 09/05/2023
Immagine 1111284 Melfi Giro d'Italia Picture shooted 08/05/2023 - Published 08/05/2023
Immagine 1110608 Ortona Giro d'Italia Picture shooted 06/05/2023 - Published 06/05/2023
Immagine 1110607 Ortona Giro d'Italia Picture shooted 06/05/2023 - Published 06/05/2023
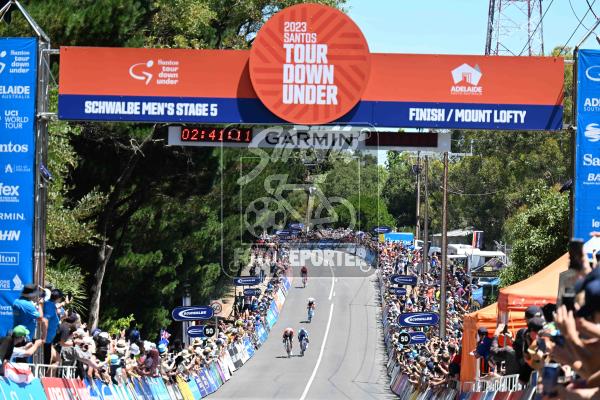
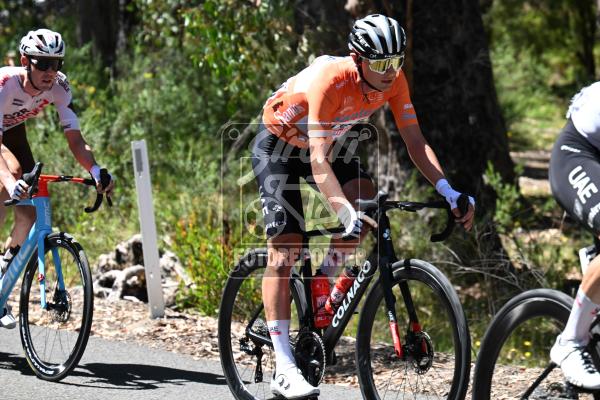
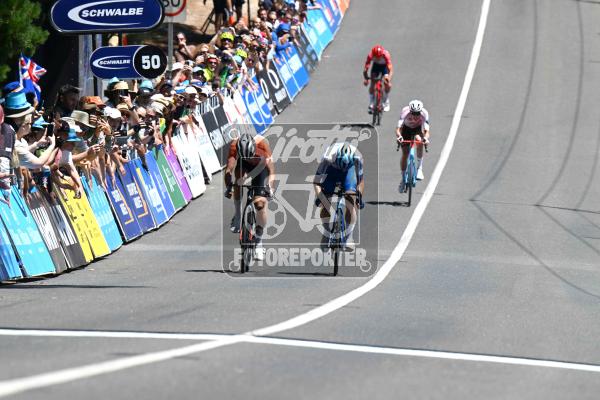
Immagine 1090951 Mont Lofty Tour Down Under Picture shooted 22/01/2023 - Published 22/01/2023
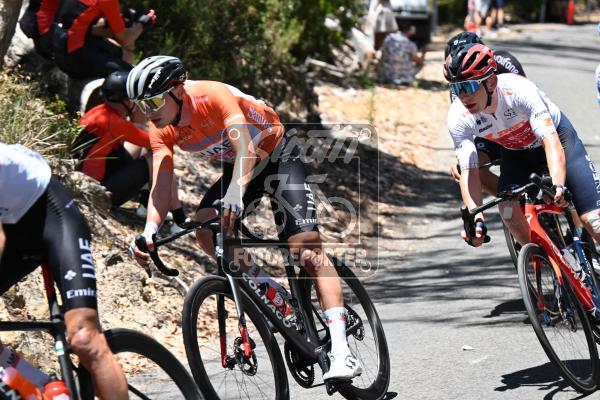
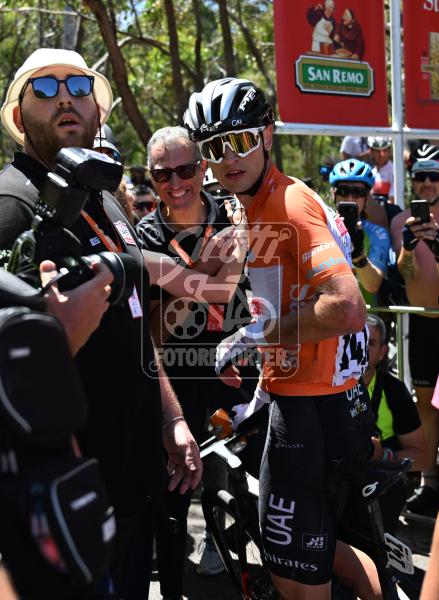
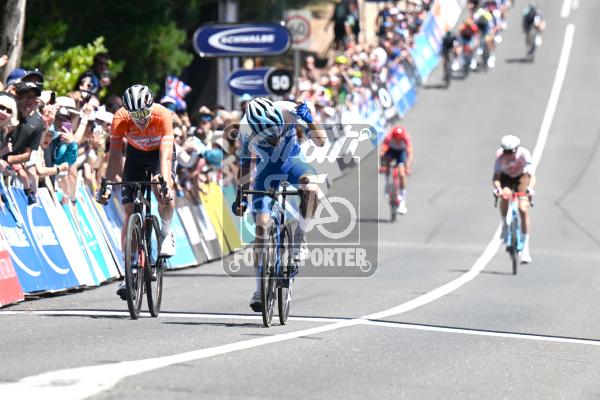
Immagine 1090950 Mont Lofty Tour Down Under Picture shooted 22/01/2023 - Published 22/01/2023
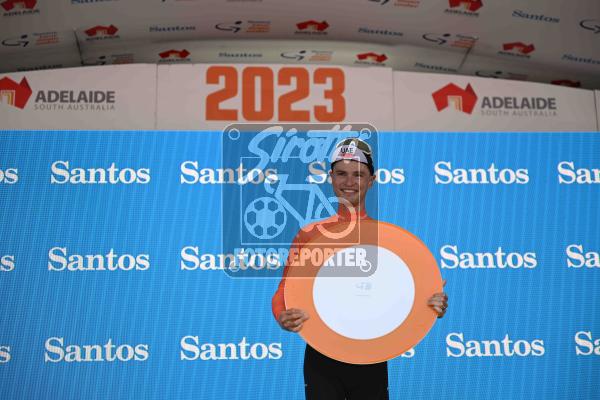
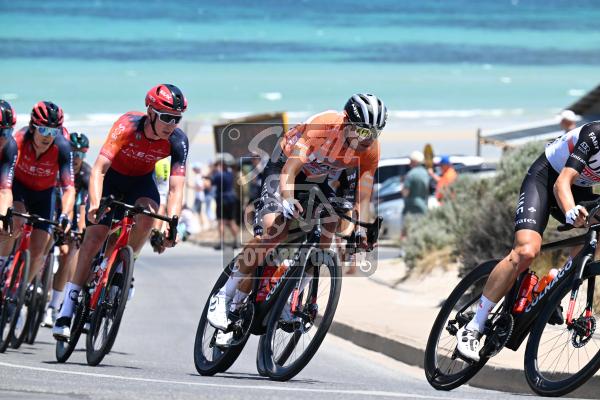
Immagine 1090857 Mont Lofty Tour Down Under Picture shooted 22/01/2023 - Published 22/01/2023
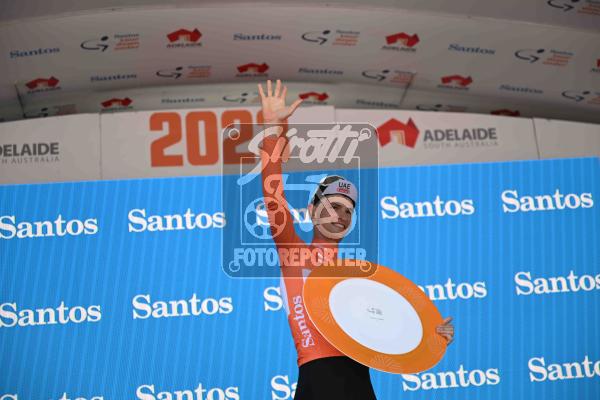
Immagine 1090853 Mont Lofty Tour Down Under Picture shooted 22/01/2023 - Published 22/01/2023
Immagine 1090852 Mont Lofty Tour Down Under Picture shooted 22/01/2023 - Published 22/01/2023
Immagine 1090824 Mont Lofty Tour Down Under Picture shooted 22/01/2023 - Published 22/01/2023
Immagine 1090822 Mont Lofty Tour Down Under Picture shooted 22/01/2023 - Published 22/01/2023
Immagine 1090786 Mont Lofty Tour Down Under Picture shooted 22/01/2023 - Published 22/01/2023
Immagine 1090771 Mont Lofty Tour Down Under Picture shooted 22/01/2023 - Published 22/01/2023
Immagine 1090765 Mont Lofty Tour Down Under Picture shooted 22/01/2023 - Published 22/01/2023
Immagine 1090766 Mont Lofty Tour Down Under Picture shooted 22/01/2023 - Published 22/01/2023
Immagine 1090764 Mont Lofty Tour Down Under Picture shooted 22/01/2023 - Published 22/01/2023
Immagine 1090763 Mont Lofty Tour Down Under Picture shooted 22/01/2023 - Published 22/01/2023
Immagine 1090762 Mont Lofty Tour Down Under Picture shooted 22/01/2023 - Published 22/01/2023
Immagine 1090761 Mont Lofty Tour Down Under Picture shooted 22/01/2023 - Published 22/01/2023
Immagine 1090760 Mont Lofty Tour Down Under Picture shooted 22/01/2023 - Published 22/01/2023
Immagine 1090759 Mont Lofty Tour Down Under Picture shooted 22/01/2023 - Published 22/01/2023
Immagine 1090758 Mont Lofty Tour Down Under Picture shooted 22/01/2023 - Published 22/01/2023
Immagine 1090757 Mont Lofty Tour Down Under Picture shooted 22/01/2023 - Published 22/01/2023
Immagine 1090756 Mont Lofty Tour Down Under Picture shooted 22/01/2023 - Published 22/01/2023
Immagine 1090755 Mont Lofty Tour Down Under Picture shooted 22/01/2023 - Published 22/01/2023
Immagine 1090745 Mont Lofty Tour Down Under Picture shooted 22/01/2023 - Published 22/01/2023
Immagine 1090744 Mont Lofty Tour Down Under Picture shooted 22/01/2023 - Published 22/01/2023
Immagine 1090743 Mont Lofty Tour Down Under Picture shooted 22/01/2023 - Published 22/01/2023
Immagine 1090742 Mont Lofty Tour Down Under Picture shooted 22/01/2023 - Published 22/01/2023
Immagine 1090741 Mont Lofty Tour Down Under Picture shooted 22/01/2023 - Published 22/01/2023
Immagine 1090740 Mont Lofty Tour Down Under Picture shooted 22/01/2023 - Published 22/01/2023
Immagine 1090730 Mont Lofty Tour Down Under Picture shooted 22/01/2023 - Published 22/01/2023
Immagine 1090729 Mont Lofty Tour Down Under Picture shooted 22/01/2023 - Published 22/01/2023
Immagine 1090727 Mont Lofty Tour Down Under Picture shooted 22/01/2023 - Published 22/01/2023
Immagine 1090726 Mont Lofty Tour Down Under Picture shooted 22/01/2023 - Published 22/01/2023
Immagine 1090725 Mont Lofty Tour Down Under Picture shooted 22/01/2023 - Published 22/01/2023
Immagine 1090724 Mont Lofty Tour Down Under Picture shooted 22/01/2023 - Published 22/01/2023
Immagine 1090627 Aldinga Beach Tour Down Under Picture shooted 21/01/2023 - Published 21/01/2023
Immagine 1090626 Aldinga Beach Tour Down Under Picture shooted 21/01/2023 - Published 21/01/2023
Immagine 1090625 Aldinga Beach Tour Down Under Picture shooted 21/01/2023 - Published 21/01/2023
Immagine 1090624 Port Willunga Tour Down Under Picture shooted 21/01/2023 - Published 21/01/2023
Immagine 1090618 Tour Down Under Picture shooted 21/01/2023 - Published 21/01/2023
Immagine 1090577 Port Willunga Tour Down Under Picture shooted 21/01/2023 - Published 21/01/2023
Immagine 1090576 Port Willunga Tour Down Under Picture shooted 21/01/2023 - Published 21/01/2023
Immagine 1090575 Port Willunga Tour Down Under Picture shooted 21/01/2023 - Published 21/01/2023
Immagine 1090574 Port Willunga Tour Down Under Picture shooted 21/01/2023 - Published 21/01/2023
Immagine 1090573 Port Willunga Tour Down Under Picture shooted 21/01/2023 - Published 21/01/2023
Immagine 1090572 Port Willunga Tour Down Under Picture shooted 21/01/2023 - Published 21/01/2023
Immagine 1090570 Port Willunga Tour Down Under Picture shooted 21/01/2023 - Published 21/01/2023
Immagine 1090569 Port Willunga Tour Down Under Picture shooted 21/01/2023 - Published 21/01/2023
Immagine 1090568 Port Willunga Tour Down Under Picture shooted 21/01/2023 - Published 21/01/2023
Immagine 1090560 Port Willunga Tour Down Under Picture shooted 21/01/2023 - Published 21/01/2023
Immagine 1090559 Port Willunga Tour Down Under Picture shooted 21/01/2023 - Published 21/01/2023
Immagine 1090522 Willunga Tour Down Under Picture shooted 21/01/2023 - Published 21/01/2023
Immagine 1090521 Willunga Tour Down Under Picture shooted 21/01/2023 - Published 21/01/2023
Immagine 1090520 Willunga Tour Down Under Picture shooted 21/01/2023 - Published 21/01/2023
Immagine 1090519 Willunga Tour Down Under Picture shooted 21/01/2023 - Published 21/01/2023
Immagine 1090518 Willunga Tour Down Under Picture shooted 21/01/2023 - Published 21/01/2023
Immagine 1090506 Willunga Tour Down Under Picture shooted 21/01/2023 - Published 21/01/2023
Immagine 1090505 Willunga Tour Down Under Picture shooted 21/01/2023 - Published 21/01/2023
Immagine 1090502 Campbelltown Tour Down Under Picture shooted 20/01/2023 - Published 20/01/2023
Immagine 1090501 Campbelltown Tour Down Under Picture shooted 20/01/2023 - Published 20/01/2023
Immagine 1090487 Campbelltown Tour Down Under Picture shooted 20/01/2023 - Published 20/01/2023
Immagine 1090486 Campbelltown Tour Down Under Picture shooted 20/01/2023 - Published 20/01/2023
Immagine 1090485 Campbelltown Tour Down Under Picture shooted 20/01/2023 - Published 20/01/2023
Immagine 1090484 Campbelltown Tour Down Under Picture shooted 20/01/2023 - Published 20/01/2023
Immagine 1090399 Checker Hill Tour Down Under Picture shooted 20/01/2023 - Published 20/01/2023
Immagine 1090317 Norwood Tour Down Under Picture shooted 20/01/2023 - Published 20/01/2023