Le nouveau moteur de recherche Sirotti.it vous permet de trouver, dans quelques instants, l'image souhaitée. Le formulaire de recherche vous permet d'effectuer une recherche libre, recherche avancée avec la sélection et de recherche à travers le TAG de tendon. Ces modes peuvent être utilisés simultanément pour obtenir des résultats rapides raffinés. Pour obtenir un peu plus nombreux résultats utilisent moins de paramètres de recherche. Si vous voulez rechercher d'autres coureurs images, des équipes ou des caractères dans la même image, vous pouvez utiliser une recherche de ce type: "Cipollini AND Pantani"
Immagine 1145925 Willunga Hill Tour Down Under Photo prise 20/01/2024 - Publié 20/01/2024
Immagine 1145907 Willunga Hill Tour Down Under Photo prise 20/01/2024 - Publié 20/01/2024
Immagine 1145860 Port Elliot Tour Down Under Photo prise 19/01/2024 - Publié 19/01/2024
Immagine 1145825 Tour Down Under Photo prise 19/01/2024 - Publié 19/01/2024
Immagine 1145700 Campbelltown Tour Down Under Photo prise 18/01/2024 - Publié 18/01/2024
Immagine 1145699 Campbelltown Tour Down Under Photo prise 18/01/2024 - Publié 18/01/2024
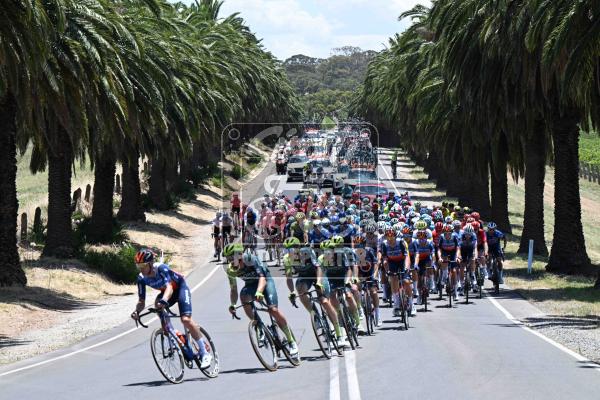
Immagine 1145698 Campbelltown Tour Down Under Photo prise 18/01/2024 - Publié 18/01/2024
Immagine 1145697 Campbelltown Tour Down Under Photo prise 18/01/2024 - Publié 18/01/2024
Immagine 1145664 Tea Tree Gully Tour Down Under Photo prise 18/01/2024 - Publié 18/01/2024
Immagine 1145663 Tea Tree Gully Tour Down Under Photo prise 18/01/2024 - Publié 18/01/2024
Immagine 1145662 Tea Tree Gully Tour Down Under Photo prise 18/01/2024 - Publié 18/01/2024
Immagine 1145661 Tea Tree Gully Tour Down Under Photo prise 18/01/2024 - Publié 18/01/2024
Immagine 1145652 Tour Down Under Photo prise 18/01/2024 - Publié 18/01/2024
Immagine 1145651 Tour Down Under Photo prise 18/01/2024 - Publié 18/01/2024
Immagine 1145640 Tour Down Under Photo prise 18/01/2024 - Publié 18/01/2024
Immagine 1145638 Tour Down Under Photo prise 18/01/2024 - Publié 18/01/2024
Immagine 1145634 Tour Down Under Photo prise 18/01/2024 - Publié 18/01/2024
Immagine 1145631 Campbelltown Tour Down Under Photo prise 18/01/2024 - Publié 18/01/2024
Immagine 1145625 Tea Tree Gully Tour Down Under Photo prise 18/01/2024 - Publié 18/01/2024
Immagine 1145624 Tea Tree Gully Tour Down Under Photo prise 18/01/2024 - Publié 18/01/2024
Immagine 1145608 Campbelltown Tour Down Under Photo prise 18/01/2024 - Publié 18/01/2024
Immagine 1145607 Campbelltown Tour Down Under Photo prise 18/01/2024 - Publié 18/01/2024
Immagine 1145606 Campbelltown Tour Down Under Photo prise 18/01/2024 - Publié 18/01/2024
Immagine 1145605 Campbelltown Tour Down Under Photo prise 18/01/2024 - Publié 18/01/2024
Immagine 1145604 Campbelltown Tour Down Under Photo prise 18/01/2024 - Publié 18/01/2024
Immagine 1145603 Campbelltown Tour Down Under Photo prise 18/01/2024 - Publié 18/01/2024
Immagine 1145597 Tour Down Under Photo prise 18/01/2024 - Publié 18/01/2024
Immagine 1145513 Tour Down Under Photo prise 17/01/2024 - Publié 17/01/2024
Immagine 1145510 Tour Down Under Photo prise 17/01/2024 - Publié 17/01/2024
Immagine 1145509 Tour Down Under Photo prise 17/01/2024 - Publié 17/01/2024
Immagine 1145491 Tour Down Under Photo prise 17/01/2024 - Publié 17/01/2024
Immagine 1145488 Tour Down Under Photo prise 17/01/2024 - Publié 17/01/2024
Immagine 1145464 Norwood Tour Down Under Photo prise 17/01/2024 - Publié 17/01/2024
Immagine 1145463 Norwood Tour Down Under Photo prise 17/01/2024 - Publié 17/01/2024
Immagine 1145443 Tour Down Under Photo prise 17/01/2024 - Publié 17/01/2024
Immagine 1145427 Lobethal Tour Down Under Photo prise 17/01/2024 - Publié 17/01/2024
Immagine 1145426 Lobethal Tour Down Under Photo prise 17/01/2024 - Publié 17/01/2024
Immagine 1145401 Norwood Tour Down Under Photo prise 17/01/2024 - Publié 17/01/2024
Immagine 1145400 Norwood Tour Down Under Photo prise 17/01/2024 - Publié 17/01/2024
Immagine 1145399 Norwood Tour Down Under Photo prise 17/01/2024 - Publié 17/01/2024
Immagine 1145398 Norwood Tour Down Under Photo prise 17/01/2024 - Publié 17/01/2024
Immagine 1145309 Tanunda Tour Down Under Photo prise 16/01/2024 - Publié 16/01/2024
Immagine 1145267 Tanunda Tour Down Under Photo prise 16/01/2024 - Publié 16/01/2024
Immagine 1145266 Tanunda Tour Down Under Photo prise 16/01/2024 - Publié 16/01/2024
Immagine 1145265 Tanunda Tour Down Under Photo prise 16/01/2024 - Publié 16/01/2024
Immagine 1145256 Tanunda Tour Down Under Photo prise 16/01/2024 - Publié 16/01/2024
Immagine 1145255 Tanunda Tour Down Under Photo prise 16/01/2024 - Publié 16/01/2024
Immagine 1145254 Tanunda Tour Down Under Photo prise 16/01/2024 - Publié 16/01/2024
Immagine 1145174 Tour Down Under Photo prise 16/01/2024 - Publié 16/01/2024
Immagine 1145173 Tour Down Under Photo prise 16/01/2024 - Publié 16/01/2024
Immagine 1145171 Tour Down Under Photo prise 16/01/2024 - Publié 16/01/2024
Immagine 1145168 Tour Down Under Photo prise 16/01/2024 - Publié 16/01/2024
Immagine 1145167 Tour Down Under Photo prise 16/01/2024 - Publié 16/01/2024
Immagine 1145166 Tour Down Under Photo prise 16/01/2024 - Publié 16/01/2024
Immagine 1145165 Tour Down Under Photo prise 16/01/2024 - Publié 16/01/2024
Immagine 1145164 Tour Down Under Photo prise 16/01/2024 - Publié 16/01/2024
Immagine 1145128 Adelaide Hotel Hilton Photo prise 15/01/2024 - Publié 15/01/2024
Immagine 1145127 Adelaide Hotel Hilton Photo prise 15/01/2024 - Publié 15/01/2024
Immagine 1145126 Adelaide Hotel Hilton Photo prise 15/01/2024 - Publié 15/01/2024
Immagine 1145116 Adelaide Hotel Hilton Photo prise 15/01/2024 - Publié 15/01/2024
Immagine 1145115 Adelaide Hotel Hilton Photo prise 15/01/2024 - Publié 15/01/2024
Immagine 1145104 Adelaide Hotel Hilton Photo prise 15/01/2024 - Publié 15/01/2024
Immagine 1145103 Adelaide Hotel Hilton Photo prise 15/01/2024 - Publié 15/01/2024
Immagine 1145100 Adelaide Hotel Hilton Photo prise 15/01/2024 - Publié 15/01/2024
Immagine 1145053 Adelaide Photo prise 15/01/2024 - Publié 15/01/2024
Immagine 1144886 Adelaide Down Under Classic Photo prise 13/01/2024 - Publié 13/01/2024
Immagine 1144879 Adelaide Down Under Classic Photo prise 13/01/2024 - Publié 13/01/2024
Immagine 1144873 Adelaide Down Under Classic Photo prise 13/01/2024 - Publié 13/01/2024
Immagine 1144841 Adelaide Down Under Classic Photo prise 13/01/2024 - Publié 13/01/2024
Immagine 1144833 Adelaide Down Under Classic Photo prise 13/01/2024 - Publié 13/01/2024
Immagine 1144819 Adelaide Down Under Classic Photo prise 13/01/2024 - Publié 13/01/2024
Immagine 1144756 Adelaide Down Under Classic Photo prise 13/01/2024 - Publié 13/01/2024
Immagine 1144745 Adelaide Down Under Classic Photo prise 13/01/2024 - Publié 13/01/2024
Immagine 1144696 Adelaide Down Under Classic Photo prise 13/01/2024 - Publié 13/01/2024
Immagine 1144679 Adelaide Down Under Classic Photo prise 13/01/2024 - Publié 13/01/2024
Immagine 1144670 Adelaide Down Under Classic Photo prise 13/01/2024 - Publié 13/01/2024
Immagine 1144646 Adelaide Down Under Classic Photo prise 13/01/2024 - Publié 13/01/2024
Immagine 1144560 Adelaide Photo prise 13/01/2024 - Publié 13/01/2024
Immagine 1144499 Adelaide Photo prise 13/01/2024 - Publié 13/01/2024
Immagine 1144460 Adelaide Photo prise 12/01/2024 - Publié 12/01/2024
Immagine 1144442 Adelaide Photo prise 12/01/2024 - Publié 12/01/2024
Immagine 1144441 Adelaide Photo prise 12/01/2024 - Publié 12/01/2024
Immagine 1144440 Adelaide Photo prise 12/01/2024 - Publié 12/01/2024
Immagine 1144439 Adelaide Photo prise 12/01/2024 - Publié 12/01/2024
Immagine 1144438 Adelaide Photo prise 12/01/2024 - Publié 12/01/2024
Immagine 1144437 Adelaide Photo prise 12/01/2024 - Publié 12/01/2024
Immagine 1144436 Adelaide Photo prise 12/01/2024 - Publié 12/01/2024
Immagine 1144435 Adelaide Photo prise 12/01/2024 - Publié 12/01/2024
Immagine 1144434 Adelaide Photo prise 12/01/2024 - Publié 12/01/2024
Immagine 1144433 Adelaide Photo prise 12/01/2024 - Publié 12/01/2024
Immagine 1144432 Adelaide Photo prise 12/01/2024 - Publié 12/01/2024
Immagine 1144380 Adelaide Photo prise 12/01/2024 - Publié 12/01/2024
Immagine 1144365 Adelaide Photo prise 12/01/2024 - Publié 12/01/2024
Immagine 1144364 Adelaide Photo prise 12/01/2024 - Publié 12/01/2024
Immagine 1144363 Adelaide Photo prise 12/01/2024 - Publié 12/01/2024
Immagine 1144362 Adelaide Photo prise 12/01/2024 - Publié 12/01/2024
Immagine 1144350 Adelaide Photo prise 12/01/2024 - Publié 12/01/2024
Immagine 1144349 Adelaide Photo prise 12/01/2024 - Publié 12/01/2024
Immagine 1144346 Adelaide Photo prise 12/01/2024 - Publié 12/01/2024
Immagine 1144345 Adelaide Photo prise 12/01/2024 - Publié 12/01/2024